Specialized graphic design for a book
When I started taking courses in book editing last year, I didn’t know what formatting was (it’s also called typesetting), and stumbled into it by total accident!
When my uncle asked me to copyedit his three-volume family ancestry series, he requested changes to book size, line spacing, fonts, etc. which I started doing in the middle of editing. I didn’t realize until later that these are the things that come after book editing!
So even though I did the process completely backward compared to how books are produced at traditional publishers, I don’t regret it because I ended up taking some courses in print and ebook formatting, and discovered this was a completely new service I could offer to self-publishing authors!
Without further ado, here are the steps a book formatter needs to know how to do.
1. Book layout
The first thing to find out is what the size of the book is. This determines page size. Then the details come after:
- Margins (the space between the text and the edge of the page)
- Line and paragraph spacing
- Page number placement (you can have this either in the centre or outer corners of the pages)
- Table of contents and chapter titles
It sounds simple, and once you have the settings done right in Microsoft Word, it is quite easy to format a text-only manuscript. But what you see on a computer is still different from how a book looks when you get the printed proof, so there may be small changes you might want or need to make afterward.
If you’re thinking “I could do this myself!”, you’re right, you can, if you love or are already a pro at Microsoft Word. Amazon KDP also has interior templates you can use. But there are pro tips that most authors don’t know and these can make all the difference in making your book look professional.
2. Typography
This is also a very simple element, but one that can make a vast difference in the “feel” of a book. Will you use a more traditional font like Georgia or Garamond, or a more minimal and modern font like Franklin Gothic or Helvetica? The possibilities are quite endless, and if you’re an author who doesn’t know how type fonts “feel” or you don’t care, a good formatter can make this decision for you.
Another thing to know is that the cover of a book can determine typography. Many self-publishing authors will use an absolutely horrific font on their cover that dates it almost 30 years, and they don’t even know it. So I suggest your cover gets designed before interior formatting begins because the cover of a book sets the entire mood of the book.
One pro tip that I shared in my formatting video is that pro-looking books have cover pages that mimic the cover.
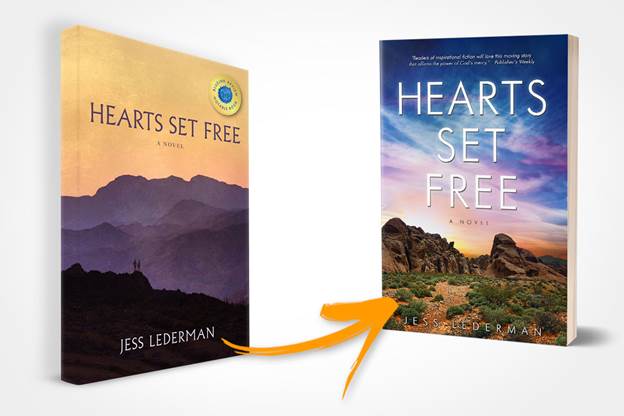
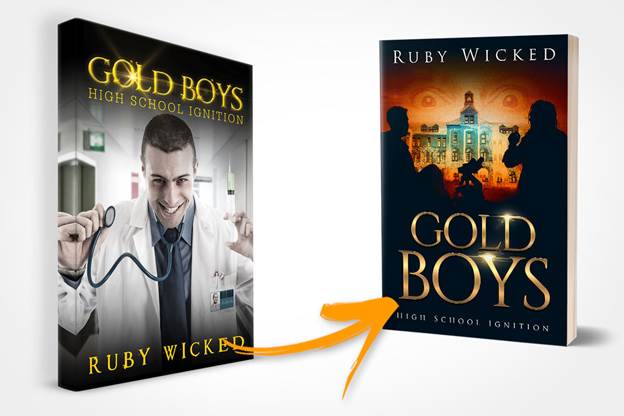
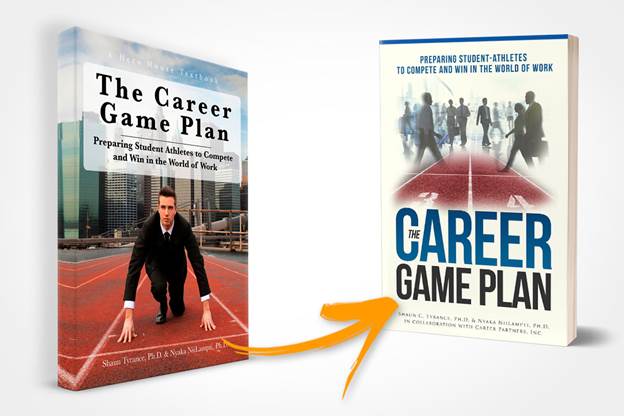
Below are a couple of great book re-designs from BuildBookBuzz. While I am NOT a book cover designer, right off the bat I can see that what the better covers have in common are bigger, centred titles and stronger, more abstract photos vs photos that are distracting.
Again, you can use templates to design your own book cover, but I’d recommend hiring a professional designer. (For my book, I went an unconventional route and got my designer to do the ENTIRE book!)

3. Ebook conversion
“All I gotta do is convert this .docx file to .html…” It sounds easy enough, but it isn’t.
Ebooks are in a file format called .ePUB which gets opened by Kindle and similar readers. I learned the process of converting a manuscript to ePUB from an online course, which involves converting the Word doc to HTML (using a free online service), and then opening that up in a (free) program called Sigil. Once opened in Sigil, further changes are made before the file is saved, tested, and then uploaded to the book platform for sale.
I know that there is more than one way to do this; others use Adobe InDesign to create an ePUB file. Whichever way you choose, make sure the formatter you hire doesn’t just take the same file that was used in print formatting, convert that to ePUB without making any changes, and upload it, because this can cause some issues and grief for your reader.
For example, a Table of Contents should be properly hyperlinked so that when the reader clicks on a chapter, they’re taken directly to where the chapter starts. If your book doesn’t do this, the reader has to scroll through the book to find the chapter they’re looking for.
One ebook that I bought from Amazon not only had this issue, but the print page numbers were in it and appeared throughout the book randomly in the middle of the page. Ebooks don’t have pages; they have locations because the reader can expand or decrease the size of the words on a page. So you can’t use the same pagination as with your print book.
I wish I could show a sample page of that book for you, but I don’t want to embarrass the author.
What about audiobooks?
While audiobooks have nothing to do with formatting, it’s an option you should think about if you want another way to earn more $ from your book. You’ll need to have a good recording of your book, whether you hire a professional voice actor in a studio, or choose to narrate your book yourself.
Some people say a good microphone in your closet is all you need. Once you have your audio files, you upload them to the audiobook service, and voila! It’s also great to offer this option for those who are hearing impaired.
Are you self-publishing and need a book formatter to help you format your printed book or ebook? Contact me!